Table of Contents
Introduction
Before diving into Varnish and its functionality, let’s first understand what a cache is. A cache is a hardware or software component that stores data, allowing future requests for that data to be served faster. The data stored in a cache might be the result of an earlier computation or a copy of data stored elsewhere. Caching is one of the pillars of web performance optimization, the set of techniques to make your website load faster. No website can call itself optimized without a caching system in place.
List of the different types of caching
- Page cache: it happens on the server and stores the entire HTML of a page
- Browser cache: it keeps storing the HTML but occurs on the browser;
- CDN cache: it occurs on the CDN-side and stores the HTML and all other static files like images, CSS and JS. Cloudflare is one of the best https://flexicloud.in/cloudflare-configuration/.
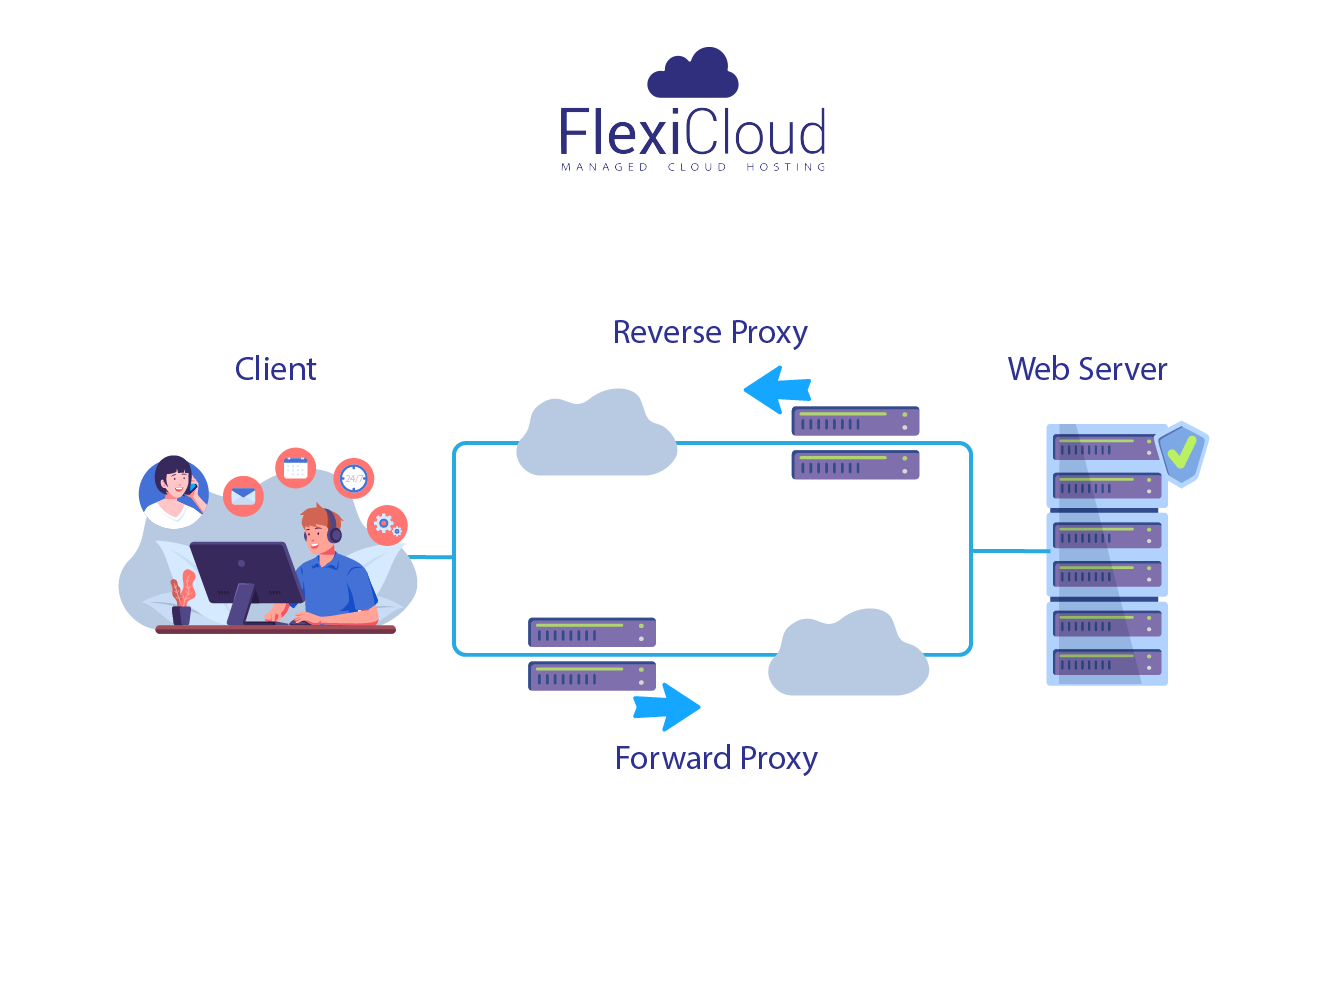
- Reverse proxy cache: it happens on the server’s side and stores all its responses to the client’s server.
Varnish is a web application accelerator designed to increase the speed of a website while simultaneously reducing the load on the web server. Varnish Cache is a free, open-source, and powerful tool for dynamic websites with high traffic.
By using Varnish Cache behind your web server, you can accelerate your website by a factor of 300 to 1000. Additionally, it can serve as a load balancer if you are running multiple servers. Varnish Cache works by caching requested web pages in memory and serving these pages quickly, without the delay of building content from scratch, when the same information is requested multiple times.
Key Features of Varnish
Here are the key features of Varnish Cache, explained in brief steps
- Load Balancing: Varnish can distribute incoming traffic across multiple backend servers. This ensures efficient resource utilization and improves the availability and reliability of the web application.
- Built for HTTP: Other web accelerators initially served as either client-side caches, which store copies of web pages on the user’s device, or as origin servers, which deliver the original content from the main server. Varnish, however, is designed specifically to handle HTTP traffic efficiently. This focus allows it to deliver web pages much more quickly, resulting in significantly faster page load times for users.
- Heavily Threaded: Each client connection is handled by a separate worker thread to maximize performance.
- Data Storage in Virtual Memory: The operating system (OS) manages data storage in virtual memory. It determines which data and programs are kept in the computer’s physical memory (RAM) and which are moved, or paged out, to the hard disk or other storage devices when there isn’t enough RAM available. This process helps optimize the use of available memory and ensures efficient system performance.
- Log Data Stored in Shared Memory: Storing log data in shared memory reduces the number of system calls needed in the fast path. This approach helps improve performance by minimizing the overhead associated with frequent system calls.
- Advanced Caching Policies: It supports various caching strategies, such as setting TTL (time-to-live) for cached content and purging outdated or invalidated cache entries. This keeps the cached content fresh and relevant.
- Compression and Decompression: Varnish can compress HTTP responses before sending them to clients, reducing bandwidth usage. It can also decompress incoming requests if needed.
- Security Features: Varnish includes security mechanisms such as IP-based access control and protection against DDoS attacks. These features help safeguard the web application from malicious activities.
- Scalability: Varnish can easily scale to handle increased traffic by adding more cache nodes or backend servers. This flexibility allows it to grow with the needs of the web application.
Working of Varnish
Varnish is an HTTP reverse proxy that speeds up web page loading by caching commonly requested pages. This means that instead of fetching data from the main server every time, Varnish can quickly provide the stored page.
When someone asks for a webpage, Varnish first checks if it has a copy in its cache. If it does, Varnish delivers the page right away, which is much faster than getting it from the original server.
Installation and Configuration of Varnish
Installation of Varnish
In this tutorial, we will show you how to set up Varnish Cache as a proxy server for Nginx on Ubuntu 20.04.
Step: 1 Update System Packages
Ensure that your system packages are up-to-date. Run the following command as root
apt-get update -y

Step: 2 Install Varnish
Install Varnish Cache using the following command
apt-get install varnish -y

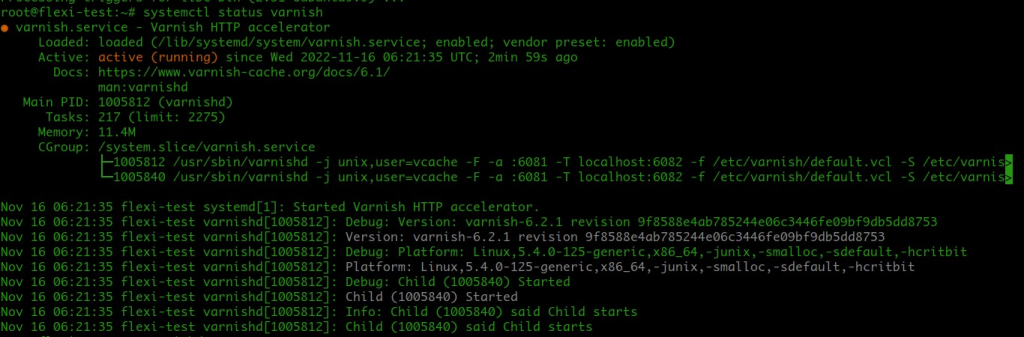
Confirm that the Varnish service is running with check varnish service Status
systemctl status varnish
You can also verify the installed version of Varnish with the following command
varnishd -V

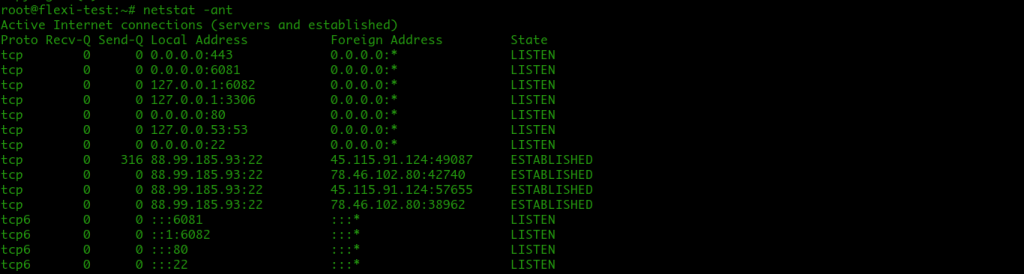
Step: 3 Verify Listening Port: Ensure Varnish is listening on the correct port by running
netstat -ant
Install and Configure Nginx
Step:1 Install Nginx: First, install the Nginx web server with the following command
apt-get install nginx -y
Step: 2 Edit Nginx Default Virtual Host Configuration: After installing Nginx, modify the default virtual host configuration file
vi /etc/nginx/sites-available/default
server {
listen 8088 default_server;
listen [::]:8088 default_server;
root /var/www/html;
index index.html index.htm index.nginx-debian.html;
server_name _;
location / {
try_files $uri $uri/ =404;
}
}
Note : Ensure you have deleted or commented out all of the default entries in the files, make sure only the above content is saved. Failure to do this will result in the nginx service refusing to start.
Save and close the file when you are finished. Then, restart the Nginx service to apply the configuration:
Configure Varnish Cache
Next, you will need to configure Varnish to use port 80 so it can route traffic to the Nginx web server via the Varnish cache server.
- You can do it by editing the file /lib/systemd/system/varnish.service: Change the Varnish default port from 6081 to 80 as shown below:
vi /lib/systemd/system/varnish.service
- Update Varnish Port Configuration: Modify the Varnish service file to change the default port from 6081 to 80. Ensure the ExecStart line is updated as shown below:
[Unit]
Description=Varnish HTTP accelerator
Documentation=https://www.varnish-cache.org/docs/6.1/
man:varnishd
[Service]
Type=simple
LimitNOFILE=131072
LimitMEMLOCK=82000
ExecStart=/usr/sbin/varnishd -j unix,user=vcache -F -a :80 -T localhost:6082 -f /etc/varnish/default.vcl -S /etc/varnish/secret -s malloc,256m
ExecReload=/usr/share/varnish/varnishreload
ProtectSystem=full
ProtectHome=true
PrivateTmp=true
PrivateDevices=true
[Install]
WantedBy=multi-user.target
Save and Close the File: After editing, save and close the file.
Reload Systemd Daemon: Reload the systemd configuration to apply the changes
systemctl daemon-reload
Next, you will need to configure Nginx as a backend server for Varnish. You can do it by editing the file /etc/varnish/default.vcl:
vi /etc/varnish/default.vcl
Change the port from 8080 to 8088, Save and close the file when you are finished.
Note: Replace 127.0.0.1 with your Nginx server IP address if your Nginx web server is installed on the other host.
Restart Varnish Service: Restart Varnish to apply the new port configuration
systemctl restart varnish
These steps will configure Varnish to listen on port 80, enabling it to route traffic to the Nginx web server.
Verify Varnish Cache Server
At this point, the Varnish cache is configured to work with the Nginx web server. It’s time to test it.
You can check the Varnish cache with the curl command as shown below: You can also verify Varnish caching statistics with the following command:
Varnishstat
You should see the following screen:

View Varnish Log Entries: Use varnishtop to see a real-time view of the most frequently logged Varnish entries:
varnishtop
This command helps monitor traffic and understand how Varnish is processing requests.
Check Varnish Logs: To troubleshoot any issues with Varnish, view the log entries with:
tail -f /var/log/varnish/varnishncsa.log
Conclusion
Your website should now load faster because Varnish will retrieve most of the frequently requested content from the memory.Enjoy the enhanced performance, thanks to the blazing fast Varnish cache.
TRENDING OFFER