Table of Contents
Introduction
When you first set up WordPress, your hosting provider automatically assigns a default maximum file upload size. This limit typically ranges from 2MB to 500MB, depending on your hosting plan. While this is sufficient for most users, there are scenarios where you may need to upload large files, such as high-resolution images, audio files, videos, or even large themes and plugins. In such cases, you’ll need to increase the maximum file upload limit to avoid issues.
How to Check the Current Maximum File Upload Limit
Before making any changes, it’s important to check your current file upload limit. You can do this by navigating to your WordPress admin panel.
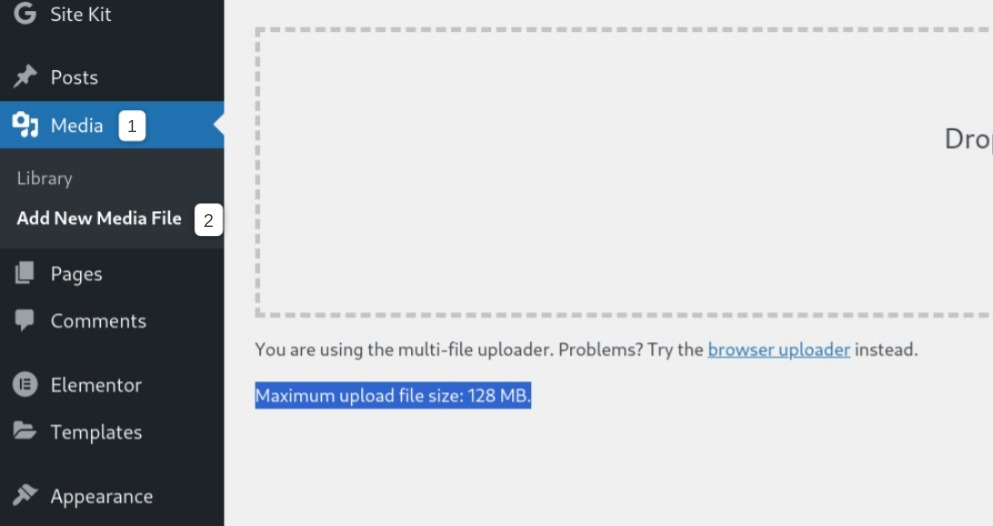
- Go to Media » Add New.
- Here, you’ll see the maximum file upload size displayed.
If the limit is too low for your needs, you can proceed with one of the following methods to increase it.
Method 1: Modify the .user.ini File (For Dedicated Servers)
If you have a dedicated server or access to your server’s root directory, you can increase the file upload limit by editing or creating a .user.ini file in the document root of your WordPress installation.
Navigate to the document root of your WordPress installation, usually public_html or a similar directory. If a .user.ini file already exists, open it for editing. If not, create a new file named .user.ini. Then add the following code
upload_max_filesize = 256M
post_max_size = 256M
max_execution_time = 300
- upload_max_filesize = 256M: Sets the maximum file upload size to 256MB.
- post_max_size = 256M: Sets the maximum size of a POST request, which includes file uploads, to 256MB.
- max_execution_time = 300: Sets the maximum time (in seconds) that a script can run before it is terminated by the server, useful for large file uploads.
After saving the changes to .user.ini, restart your web server to apply the new settings. This can usually be done from your hosting control panel or by contacting your hosting provider.
Method 2: Modify the functions.php
If you’re on shared hosting and don’t have access to the server configuration files, you can increase the upload limit by adding code to your theme’s functions.php file.
Open the functions.php file, which is located in the /wp-content/themes/your-theme-name/ directory
At the bottom of the functions.php file, add the following lines
@ini_set( 'upload_max_size' , '256M' );
@ini_set( 'post_max_size', '256M' );
@ini_set( 'max_execution_time', '300' );
- @ini_set( ‘upload_max_size’ , ‘256M’ );: Increases the maximum file upload size to 256MB.
- @ini_set( ‘post_max_size’, ‘256M’ );: Increases the maximum size of a POST request to 256MB.
- @ini_set( ‘max_execution_time’, ‘300’ );: Extends the script execution time to 300 seconds.
Save the changes to functions.php. The new settings will take effect immediately. Go back to the Media section in your WordPress admin panel and try uploading a larger file to confirm that the upload limit has been successfully increased.
Conclusion
This guide explains how to increase the maximum file upload limit in WordPress, which can be crucial when working with large media files, themes, or plugins. We’ve covered two methods: modifying the .user.ini file on dedicated servers and adding code to the functions.php file on shared hosting. These methods allow you to customise the file upload limit to suit your specific needs, ensuring smooth and uninterrupted content management on your WordPress site.
Visit Flexicloud to discover more about our comprehensive plans and diverse features, designed to meet all your cloud computing needs
.
TRENDING OFFER