Table of Contents
Introduction
Creating a professional email account for your domain is essential for any business or personal brand. If your website is hosted with a provider that uses cPanel, you’re in luck! cPanel makes it easy to manage various aspects of your website, including creating and managing email accounts. In this guide, we’ll walk you through the simple steps to create a new email account in cPanel.
1. Login to the cPanel
2. Select the “Email accounts” option from the left top side under the “Email” page.

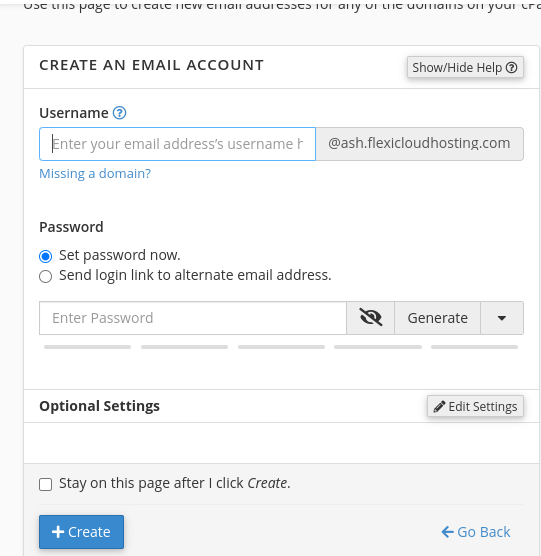
3. You can find the “Create” option on the right side of the panel.

4. You can enter the account details like username and password there, and click the ‘Create’ button. Also, there is an option called ‘Edit Settings’ – you can use that option to allocate the mailbox size.

Conclusion
Creating an email account in cPanel is a straightforward process that can enhance your professional communication. By following the steps outlined in this guide, you can easily set up and manage your own custom email addresses. Whether you’re running a business or just want a personalized email for yourself, cPanel provides the tools you need to get started quickly and efficiently. Now that you’ve set up your email account, you can take full advantage of all the features and benefits it offers. Happy emailing!
TRENDING OFFER