Table of Contents
What is Bunny CDN
A Content Delivery Network is a network of servers across a diverse selection of geographic locations that help improve the speed and quality of content delivery. Quick transfers of content types like HTML web pages, pictures, videos, spreadsheets, and JavaScript programs are possible with CDNs. BunnyCDN is a Content Delivery Network provider.
BunnyCDN is a fast, powerful, reliable network designed to provide better performance at a more affordable cost globally. Also, setting up the Bunny CDN plugin will improve your website performance to load faster than standard.
BunnyCDN provides an excellent CDN service at a competitive price. They also have their own WordPress plugin. Today, we’ll look at how to install BunnyCDN on WordPress websites.
Some key benefits and solutions of BunnyCDN
Website Acceleration: After implementing the Bunny CDN to your site, it helps to make your website faster globally.
Bunny Optimizer: As well known, one of BunnyCDN’s primary features is Bunny Optimizer. Bunny Optimizer facilitates dynamic image conversion and server conversion to WebP format. Additionally, it facilitates automatic image scaling for desktop and mobile platforms.
Replicated Cloud Storage: Bunny CDN provides a clever and distinctive solution called Replication Cloud Storage. They have features called Perma-Cache also known as Permanent Cache that help to replicate your origin server files automatically to a global storage network and store your files permanently.
Video Delivery: Bunny CDN provides fluid playback for video distribution thanks to its NVMe-based hardware and intelligent routing engine.
BunnyCDN Installation in WordPress
It’s simple to set up BunnyCDN in WordPress. Sign up with BunnyCDN, set up a pull zone, and install the BunnyCDN WordPress plugin. We’ll cover this in this tutorial.
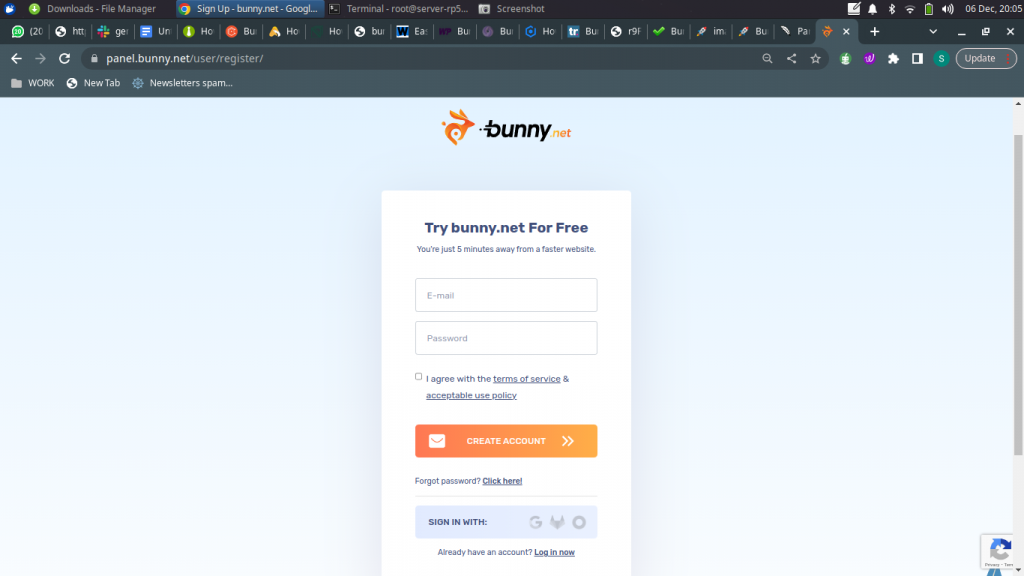
1. Create your Account
The process of creating an account is easy, and there is a free two-week trial available. Just visit bunny.net and sign up to get started.
2. Create a Pull Zone for Your Website
Before you can use Bunny CDN, you need to setup a Pull Zone under your Bunny account.
Inside your Bunny account click through to Pull Zones from the left-hand menu and then + Add Pull Zone.
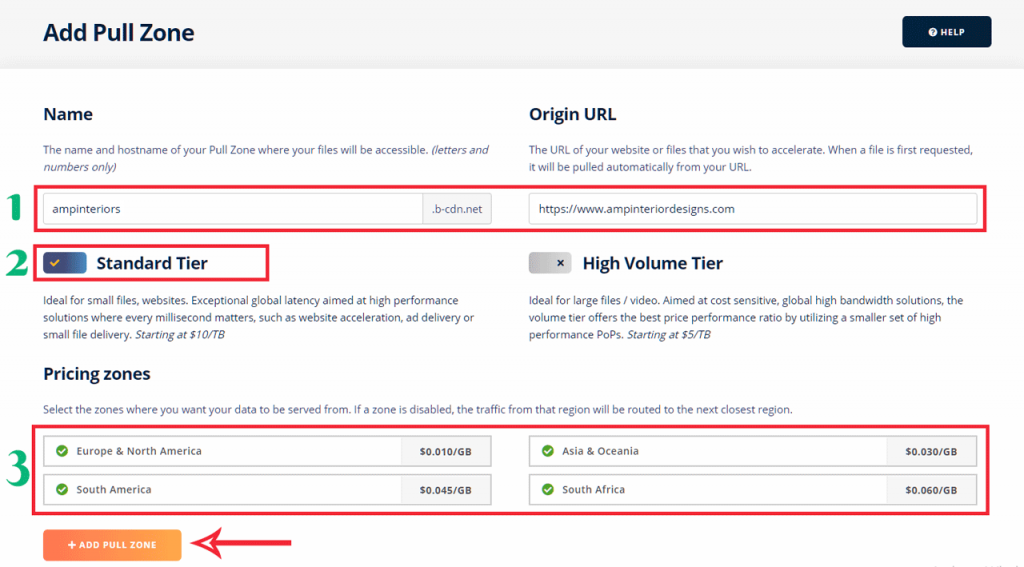
Name – Enter your website name.
(Note: Use all lowercase letters and no spaces, along with numbers
Origin URL – Enter your website’s full URL.
Standard or Volume Tier – Standard is the default option; for the majority of use situations, keep it that way.
Prizing zones – Keep all four zones checked if your visitors scatter all around the globe. Otherwise, you can uncheck any unnecessary zones.
Eventually, to activate the recently added zone, use the button “Add Pull Zone” from the screen.
Configure BunnyCDN on Your Website
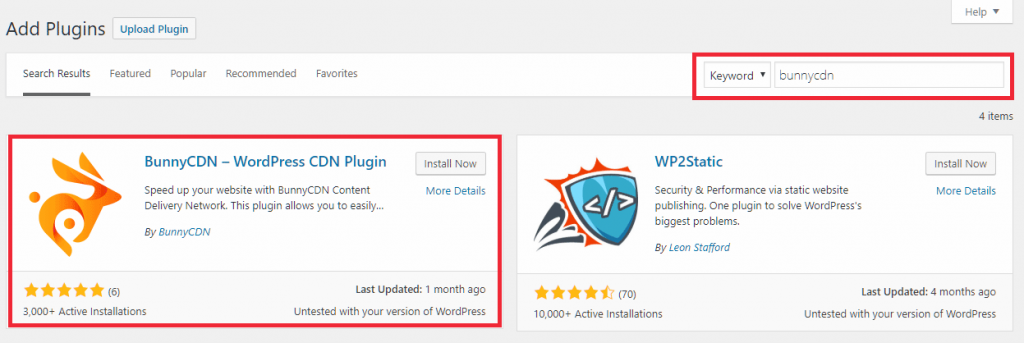
Find Dashboard > Plugins > Add new and install and activate within your WordPress website.
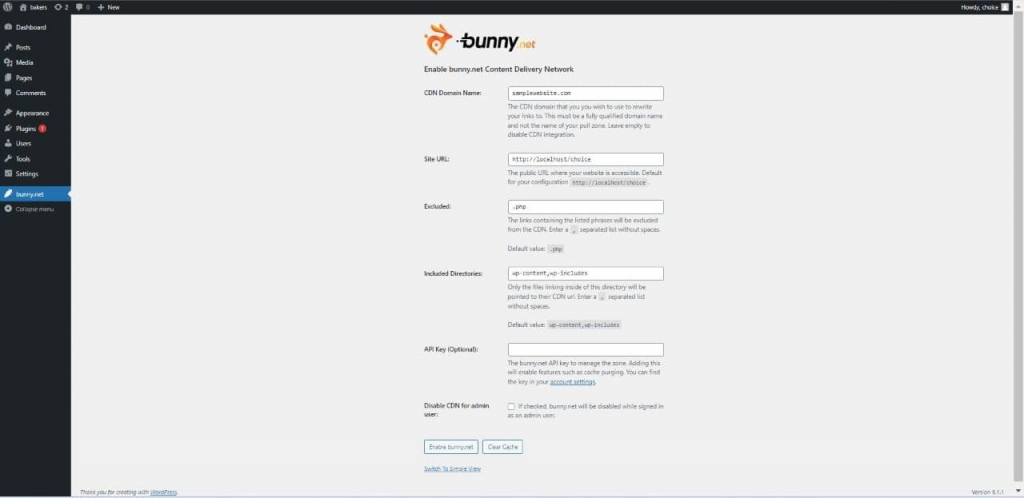
After activating the plugin, click on the BunnyCDN link from your WordPress Dashboard’s left-hand menu. After that, put your site URL in the Advanced View option.
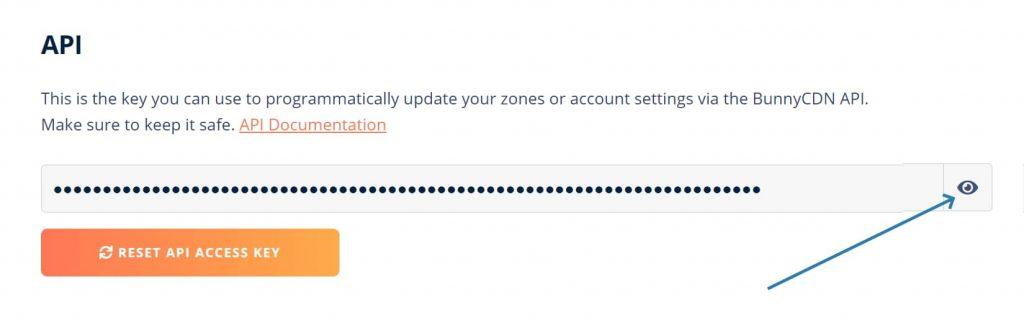
Go to your BunnyCDN dashboard and go to your account settings.
Click on the ‘eye’ icon to expose and copy your API key
Go back to your BunnyCDN settings on your website and click on the ‘Switch To Advanced View’ link.
For the ‘API Key (Optional)’ field, paste in your API Key from the steps above.
Click on the ‘Enable BunnyCDN’ button.
Force SSL
Enabling this setting configures insecure (i.e. HTTP) website requests to automatically redirect as secure (i.e. HTTPS) website requests, which also helps prevent duplicate content
From your BunnyCDN Dashboard, click on the ‘Pull Zones’ tab.
Under ‘Manage Pull Zones’, click on your website name.
Click on the ‘Security’ menu item.
In the ‘Linked Hostnames” section, toggle ON the ‘Force SSL’ setting.
Conclusion
BunnyCDN is one of the most reliable, fastest and Best CDN Providers. BunnyCDN is without a doubt the best CDN to use if you want to speed up your website. Its attractive features and security makes it one of the safest Content Delivery Networks.
TRENDING OFFER