Table of Contents
Introduction
A Simple Guide A Certificate Signing Request (CSR) is an important part of setting up an SSL certificate for your website. As you know how important that is to your site and data needs to be protected. Do you know that Generating a CSR is so much easier, if you’re using WHM (Web Host Manager) feature. Then without any delay, let’s go through the guide to learn how to generate a CSR in WHM.
Step 1: Log into WHM
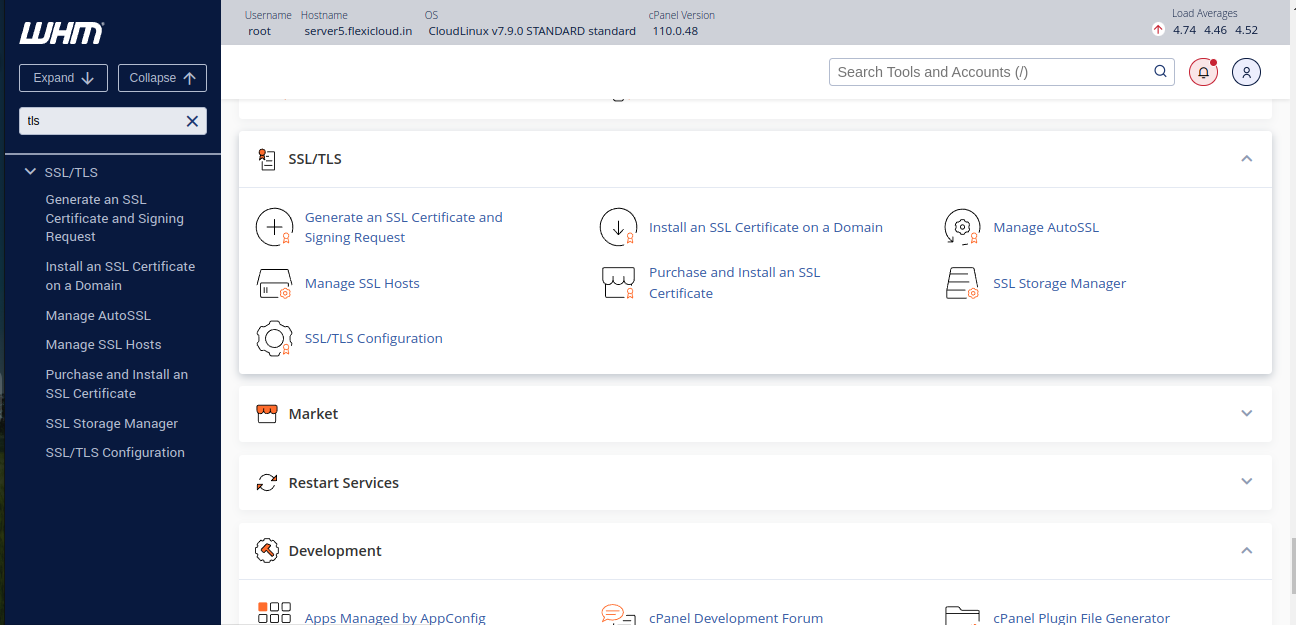
First, log into your WHM account and you will land on the WHM dashboard. Navigate to the SSL/TLS section. If you don’t see it immediately, We can type “SSL/TLS” into the search bar to find it faster.
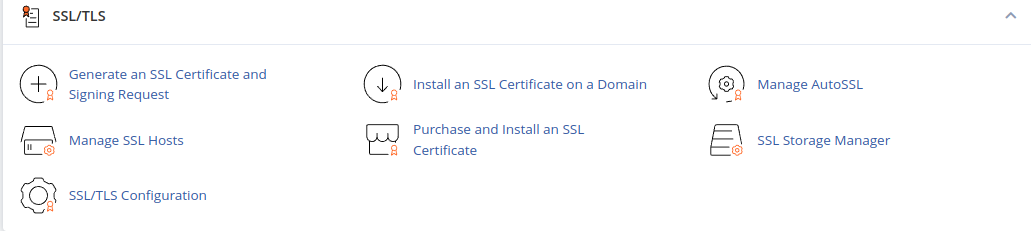
Step 2: First of all choose the option “Generate an SSL Certificate and Signing Request” from the screen.
Now from the SSL/TLS section, you need to click on the option- Generate an SSL Certificate and Signing Request and wait for the result. The same tool that helps you create CSR.
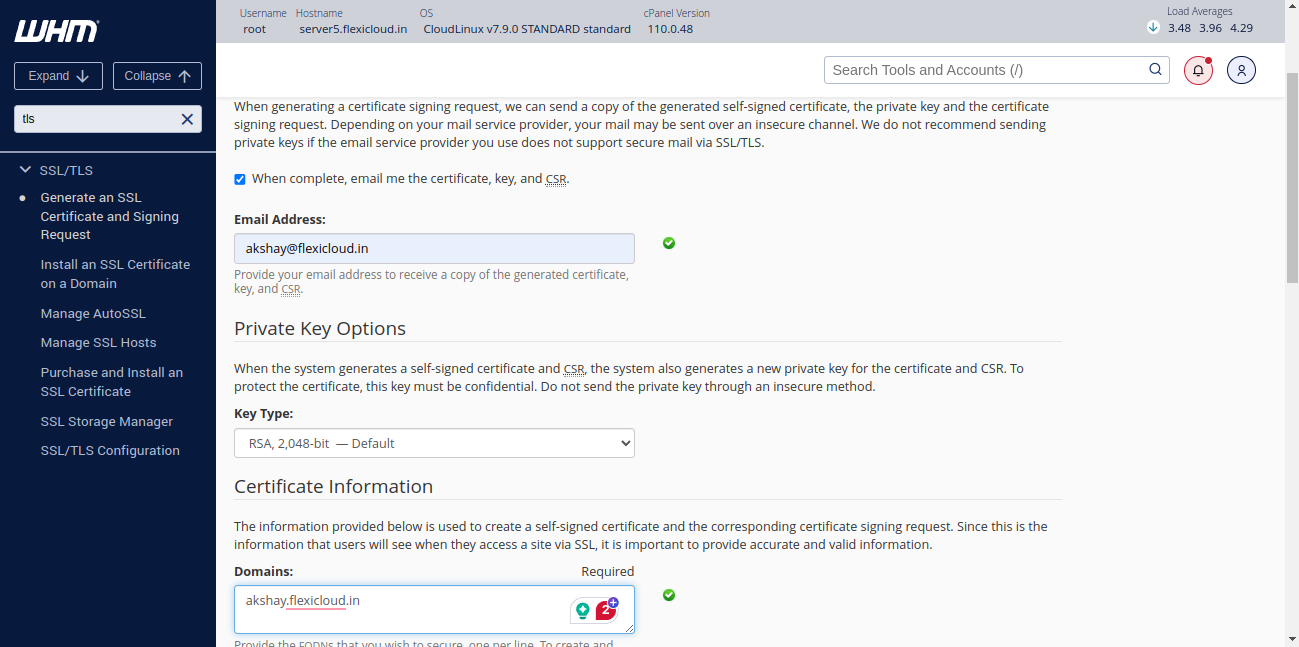
Step 3: Fill Out the CSR Details
Next, you’ll be asked to enter the required details:
Common Name: This is your domain name. And use – *.yourdomain.com format to use wildcard certificates.
Organization Information: If you’re using a Domain Validation (DV) certificate, these fields aren’t necessary. Now you should copy+paste or type “NA” in case it doesn’t apply.
Location Fields: Input your city, state, and country as needed.
Once all done, you can click on the Create button.
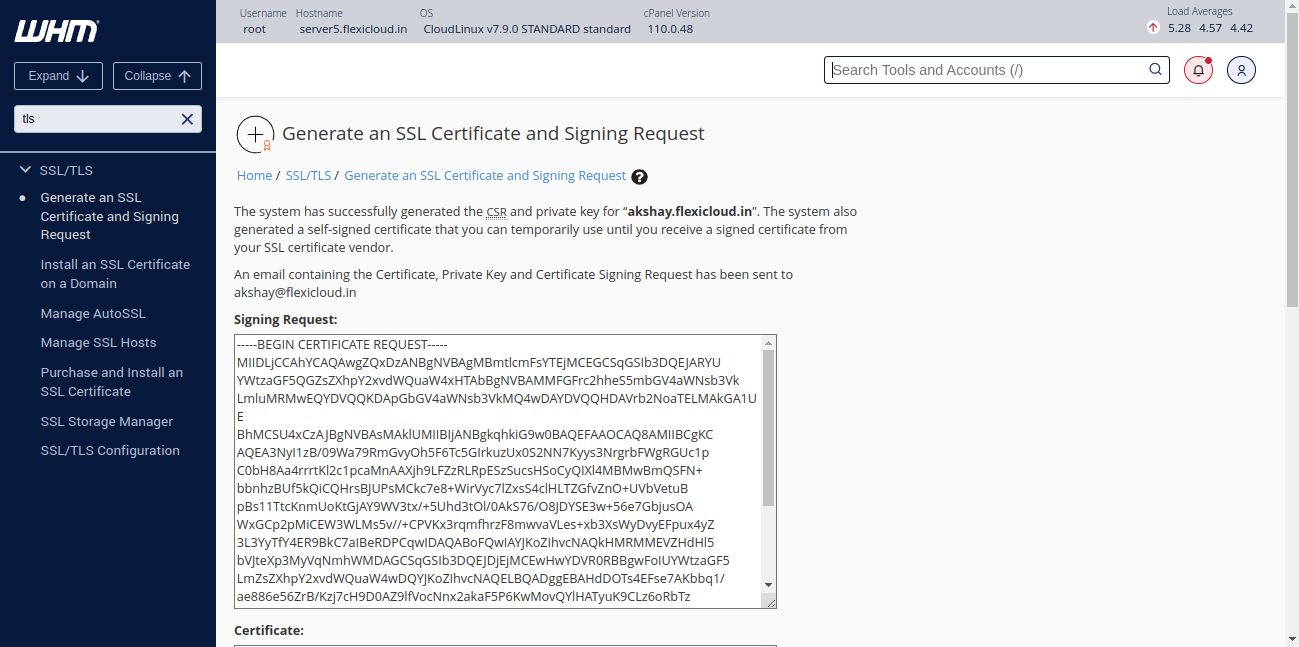
Above all, click Create option, this time WHM will generate your CSR as well as private key. Thereafter you need to share the CSR information to your chosen SSL certificate provider. The private key will be used when installing the SSL certificate, so be sure to keep it safe.
Conclusion
In final words, you should Generate a CSR in WHM, this is one of the best ways for securing your website with a valuable SSL certificate. You can follow the above given steps calmly and need to make sure you have the necessary CSR and private key to request an SSL certificate. The importance of SSL not only protects your data, but also creates trust among visitors, thereby increasing the credibility of the website.
TRENDING OFFER